

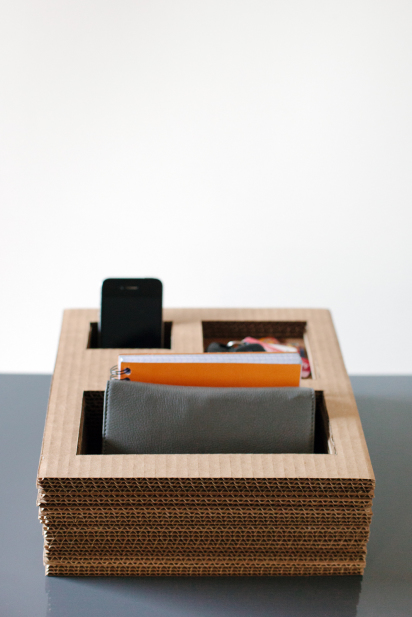
This week I’m sharing a simple, yet somewhat time intensive project. It’s a catch-all of sorts made from sheets of cardboard. I did this project in steps so it didn’t seem so daunting – it’s worth it because the end product is custom and so, so useful. Here’s how to make your own!:
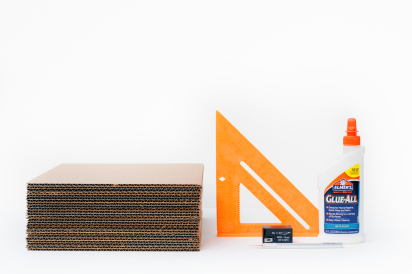
MATERIALS // 25 pieces of cardboard measuring 10″ x 10″, straight edge ruler, a pencil, glue, utility knife with plenty of extra blades.
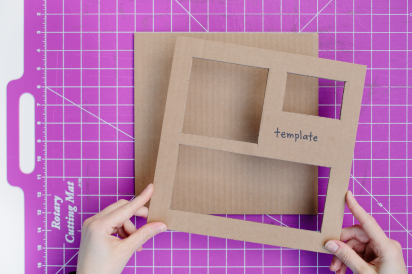
STEPS // 01 MEASURE YOUR TEMPLATE Using the straight edge and a pencil, measure a 1″ border on one piece of cardboard. This ensures enough space for sturdiness in your finished piece. Next, measure each compartment that you want to make. I measured a few items I use frequently and based my compartments accordingly.
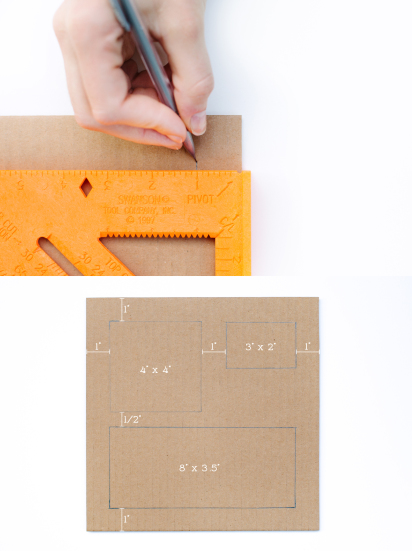
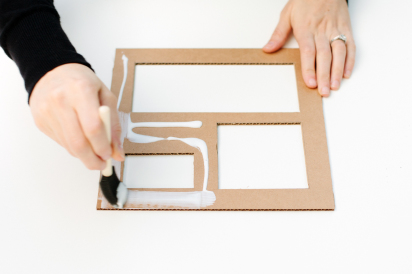
02 // CREATE TEMPLATE Once you have everything measured out, use a utility knife to cut out each compartment to create a template. This template will also serve as one of the top layers, so be sure to save it. Don’t worry about marking it up, because it will be sandwiched between other layers of cardboard.
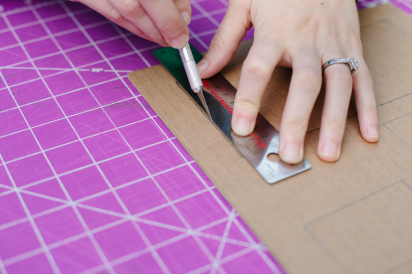
03 // MAKE YOUR PIECES Using your template, you’ll cut out 20 sheets of cardboard, like this:
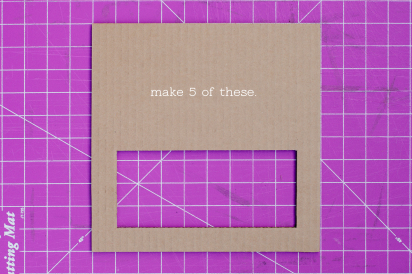
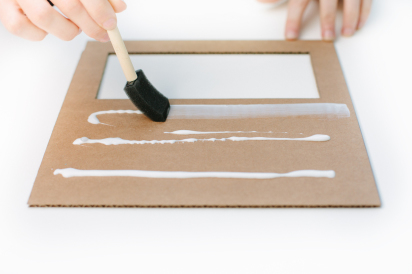
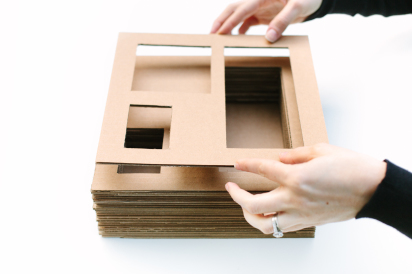
04 // GLUE PIECES TOGETHER First, glue 5 uncut pieces of cardboard together to create a bottom. Then glue the 5 pieces with the one large cutout on top of the base. Do this by squirting a thin layer of glue onto the cardboard, smooth with a brush if desired and stack directly on top of each other, making sure the sides line up on each layer as you go.
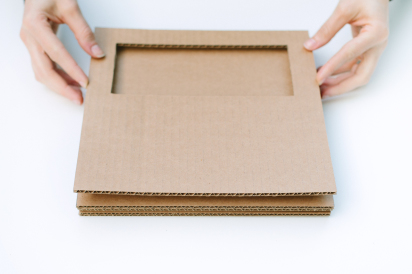
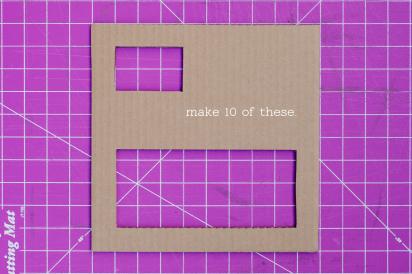
05 // KEEP GLUING Next, take the 10 pieces that have the two cutouts and glue them right on top of the stack of cardboard. Again, making sure the sides match up. 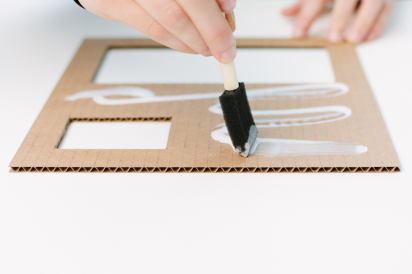
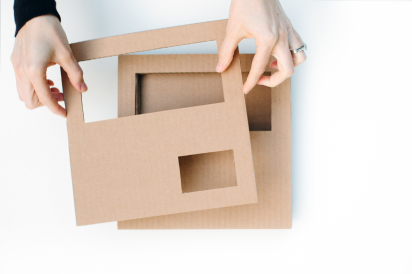
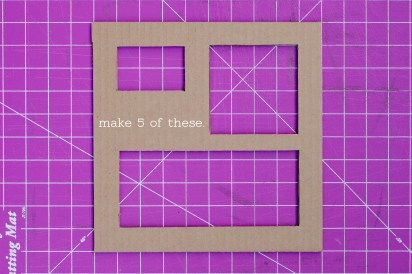
06 // FINISH GLUING Take the last 5 pieces with the three cutouts and glue them onto the stack. When finished, press firmly and allow to dry. Helpful tip: place a heavy book on top of the stack to ensure all corners adhere to one another.
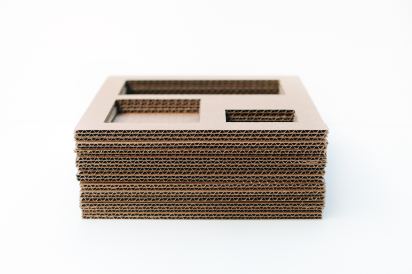
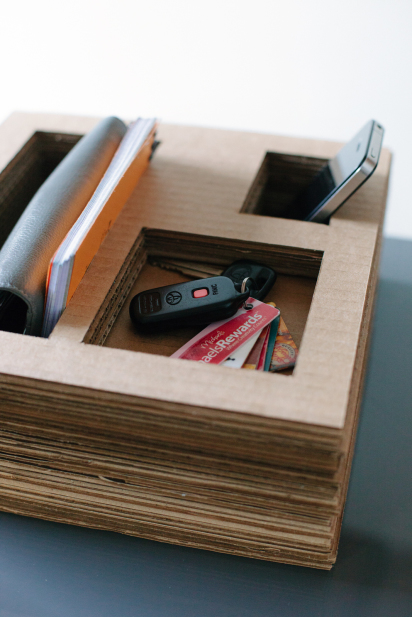
07 // ALLOW TO DRY Let the cardboard dry overnight. Then allow it to work for you by holding your essential items in a handy place!
I love this! Totally doing it for my husband’s pocket contents.
cool! i always look forward to your posts! i love this!
that laura is such a smartie! :)
How genius is this! I love the look and simplicity of it! Great idea :)
Erin you are a genius!!! I’m totally going to make one of these, love it.
Oh; I didn’t create it – my lovely contributor Laura Parke did! Isn’t she genius? :)
I LOVE the makekind posts. This is a great idea… totally want to make one of these for my desk @ work
This is one of those “why didn’t I think of that!!” ideas. Amazing! So simple!
i’m so glad you all are liking this idea!! i’ve been using the one i made and it’s come in handy for those “where did i put my keys?” moments!
I lOVE the look of this! Might have to try it out myself..
This is my absolute favorite MakeKind to date. Laura is unbelievably brilliant! :)
she totally is!!!
On the phone compartment, if you extend the cut to the complete edge of the cardboard on maybe 3 or 4 pieces, it would make a conevenient place to store the charging cable for the phone!
great idea, alex!
wow, this is just inspired. i’m a fan!
This is super cool! What a great idea for recycling cardboard
Hi
I can see that you have fun doing crafts, as do I. I love being creative and I’m Scottish so I live inexpensive solutions to every day needs. lol With that said, no offense, but this is not a very good craft idea. It is ugly and it takes up space. I really don’t think people should do craft projects just because they’re crafty. They must be pleasing to the eye. I was racking my brain trying to figure out how to salvage this eye soar and I am drawing a blank. I can only imagine my response if my wife or friends gave this to me for my bits and pieces and I would have thought “WTH? Are you kidding me?” Sorry, but I’m sure you have some really good craft ideas…but in my opinion…this isn’t one of them. Thanks anyway.
Robert
If you want to dress this up, why not use some of that fancy duct tape? You can make any design or theme you wish
WOW!! i’ve been looking like crazy this day ideas to organize my room. definitely i am going to make this one. Thank you very much for sharing!
WOW!! i’ve been looking like crazy this day ideas to organize my room. definitely i am going to make this one. Thank you very much for sharing!
Nice – do you have a email newsletter?
Nice,
This is a great idea.
such a great idea!! love it!!!
Love this! Simple and practical AND economical!
http://cafecraftea.blogspot.com