

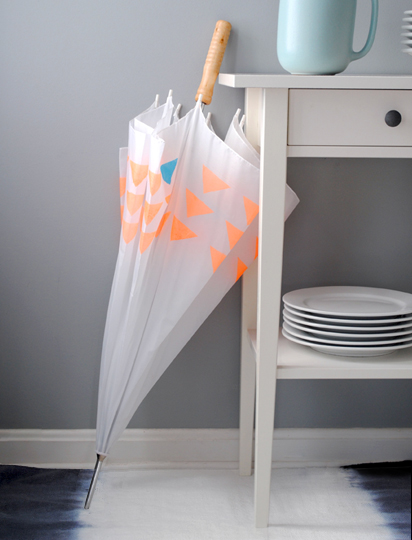
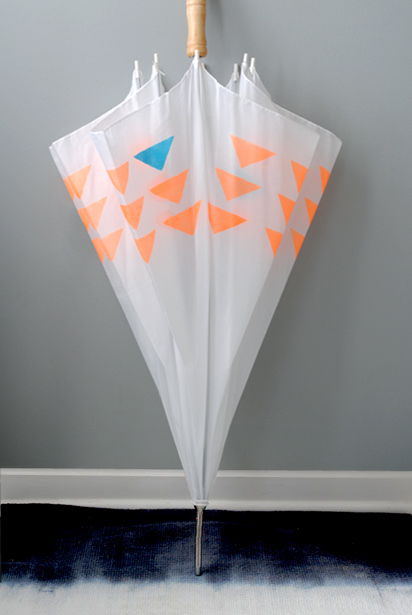
While I do love splattered paint, a neon geometric print is pretty spectacular. This week in MakeKind, I’m back sprucing up another plain umbrella with the help of some hand cut stencils and a little water proof paint. Here’s how…
MATERIALS // label stock (I used 4.25″ x 5.5″ sheets of Avery label stock), utility knife, ruler, cutting mat, waterproof paint, stencil sponge, umbrella
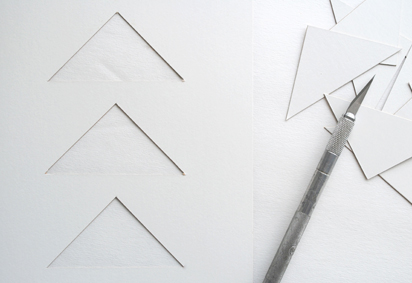
STEPS // 01 CREATE YOUR STENCILS Determine your desired stencil pattern and draw onto a piece of label stock (be sure to leave extra space around art to avoid paint from splattering onto umbrella). Then, cut out stencil using utility knife. The total number of stencils needed will vary depending on the size of your umbrella and pattern. I created 8 stencils, using each stencil 3 times before discarding.
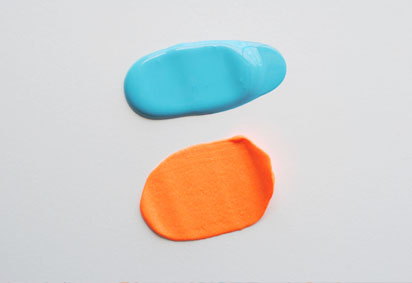
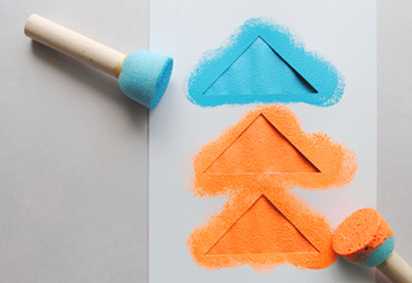
02 // PAINT YOUR UMBRELLA Open your umbrella and rest on it’s handle. Place stencil on umbrella in desired location, gently rub into place. Pour a dollop of paint onto an old plate and dip stencil sponge into paint. Next, apply paint through stencil using a light stipple effect.
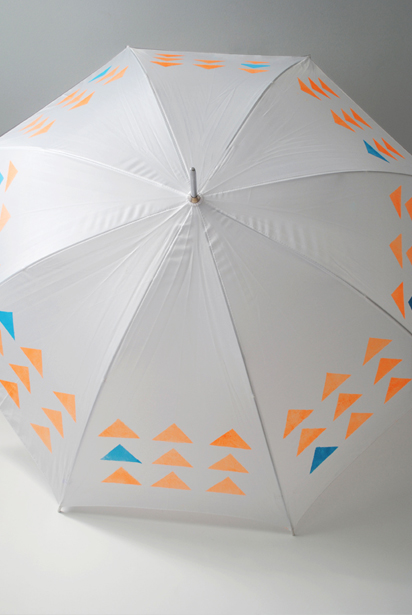
Work your way around the umbrella, painting one panel at a time. Once all panels are painted, set aside to dry overnight before using.
The more umbrellas the merrier right? Why not make a few extras to share with family and friends!
Love this simple and very beautiful idea!
thanks for sharing!
Have a nice day!
Very cute! What brand of paint did you use, out of curiosity?
Goodness, great question Claire!!! For stencil painting, I seem to have the best results with a paint specific for fabric. They tend to be a bit thicker and yield a nice clean print (I used Tulip Turquoise and Fiesta Orange Neon on this particular umbrella). For the spatter paint umbrella (Makekind 17), I used the Martha Stewart Crafts multi-purpose paints. They are a bit thinner than the Tulip paints, which worked out perfectly for splattering. Hope this helps!
Adorable! I would like to know where you got the umbrella…
I would like to do this with a group but don’t seem to be able to find a place to purchase unbrella’s at a reasonable cost. Any thoughts?
Thanks
Mia and Connie, I found mine via Amazon. I checked and it looks like they are out of the one I purchased. However, it appears you can buy direct from the wholesaler. You can find them here: http://tinyurl.com/bnwor2q
Amazon does carry the one I purchased in a pack of 10. You can find it here: http://tinyurl.com/d9bh2p4 or maybe try the wholesaler
Let me know how you make out!
ah i need to get on this project before the rainy season starts here in portland…
VERY cool DIY! (Must admit I’m a bit jealous of all the craft supplies so much more readily and cheaply available in North America) It’s such a pleasure to *discover* your blog!
Catherine @ The Spring (in Sydney)
wow!!what a great idea!!!I will try it!!
kisses from Greece
Christine! Just saw you are contributing here
Christine! Just saw you are contrbuting here (months behind in blog reading). So excited for you! Cheers! Ps…VERY cute umbrella idea
What a fabulous idea! Love the colour choices as well as the geometric design.
This would be great to do with flouresent paint !
This would be great to do with flouresent paint ! Very safety minded …
hi do you think it would work on a clear plastic umbrella?
This is great thanks also for the referals on where to get the umbrellas, I am getting married and were having a comic book themed wedding problem is its in seattle, this stencil idea is going to be a GREAT way to have the location I want but give guests a bit of cover just in case the day goes the way usual seattle days go. not only that but I am going to be able to stencil words like “pow” and “bam” on them to incorporate the theme into the umbrellas! also great favors! Will keep you posted on how it all turns out.
Love triangles and love umbrellas and love easy diy projects!